


TimeSolv has set up Billing Categories to easily refine and organize your Clients and Matters when generating invoices. Provide your customers with prompt and round the clock services with effortless and professional billing software. These categories can also be selected when generating reports. This week’s Tip of the Week will walk you through creating Billing Categories, assigning them to Clients and Matters, and then using them when generating invoices.
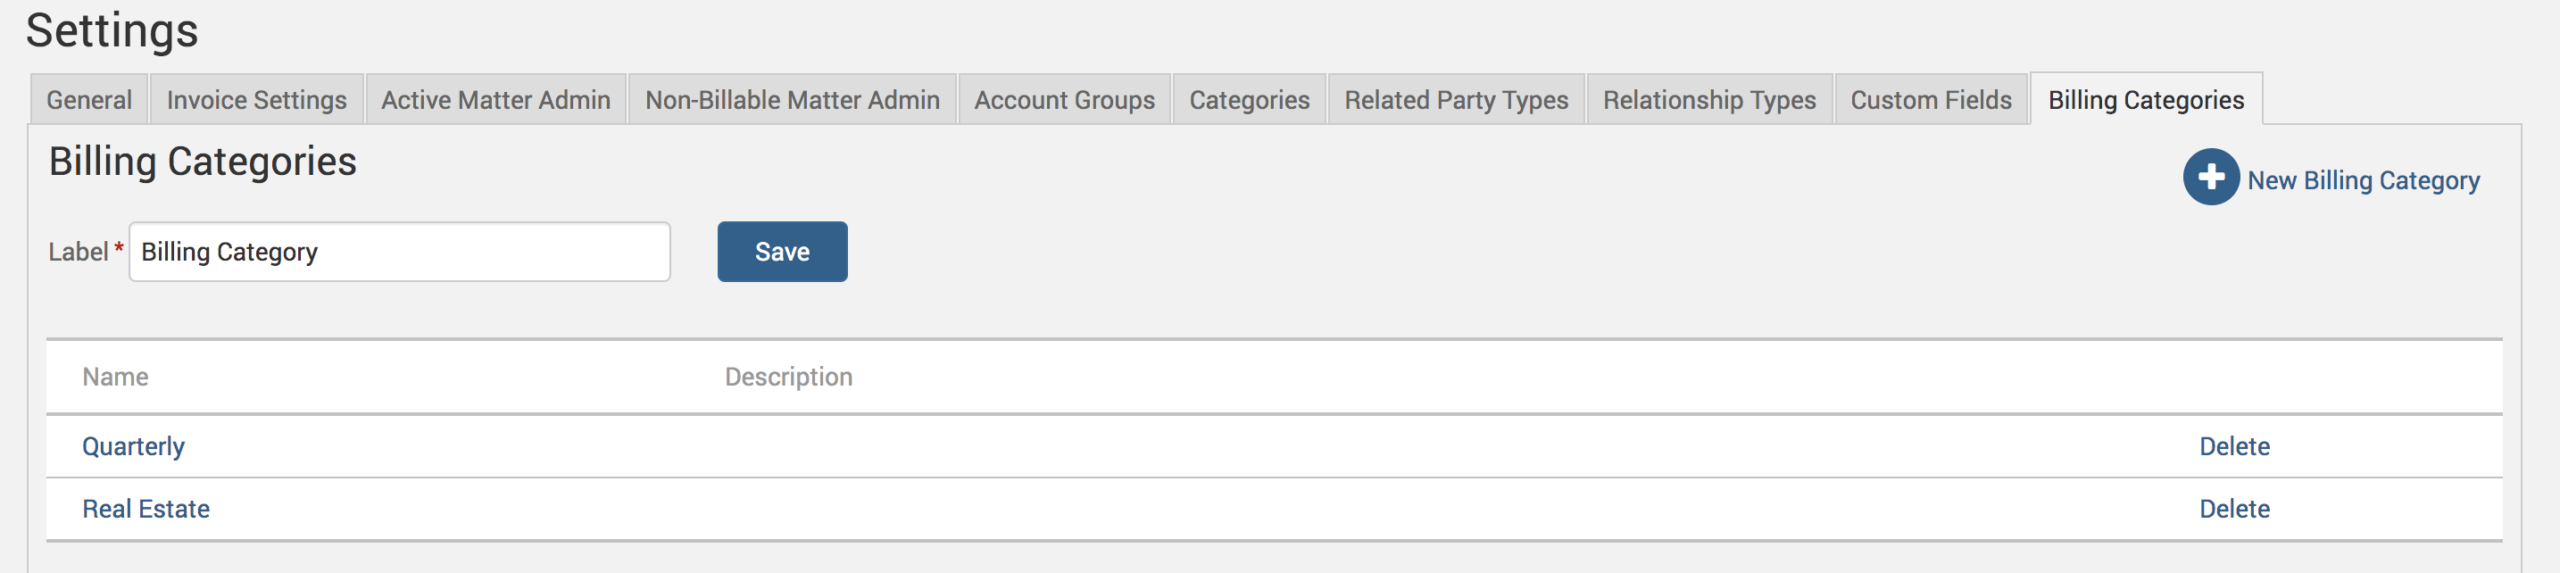
Create Billing Categories
You can create Billing Categories to help invoice your clients in more organized batches.
Head under Clients>Settings>Billing Categories tab.
Create a new Billing Category from this screen, or even rename the label to anything you wish, suiting your personal business set up.

Assign Billing Categories
Next, you’ll want to assign these Billing Categories to the appropriate Clients and Matters. To do this, click on either the Client or the Matter, and the Invoice Settings tab. Creating Client-level categories will apply them universally to all Matters created against the Client. Or to apply to a specific Matter only, create under the Matter-level.
Under the ‘Billing Arrangement’ section of this screen, you’ll see a ‘Billing Category’ field. Assign as many Billing Categories to the Client/Matter as required.
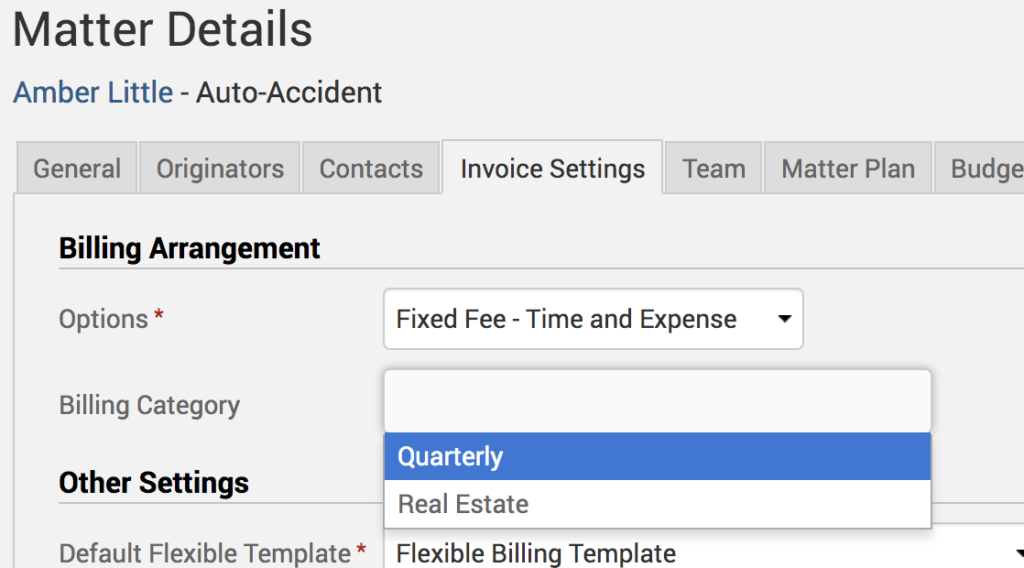

If a category is not specified for a Client or Matter, draft invoices will generate for them if the Billing Category is left at ‘None Specified.’
Generate Invoices for Billing Categories
To draft invoices by Billing Category, go to Invoices>Drafts, and click New Draft Invoices in the upper right-hand corner. Then choose the appropriate Billing Categories.

On consolidated Matters, only the Client-level Billing Categories will be used.
If you’d like TimeSolv support for more help in understanding our Billing Categories in TimeSolv, please call 1.800.715.1284 or Contact support!