


Being able to customize fields according to your individual business needs allows you to exercise greater control and flexibility by adding information beyond basic data. These user-defined fields mean you can be as creative and intuitive as needed when storing information under each individual Client and Matter.
You can set up Custom Fields either under the Clients or the Matters. Click under Clients>Settings, and head over to the Custom Fields tab. You’ll see sub-tabs here to apply Custom Fields either at the Client level or Matter Level. When you click on ‘New Custom Field’ on the top right, a window will appear allowing you to specify your needs for this new custom field you wish to create.
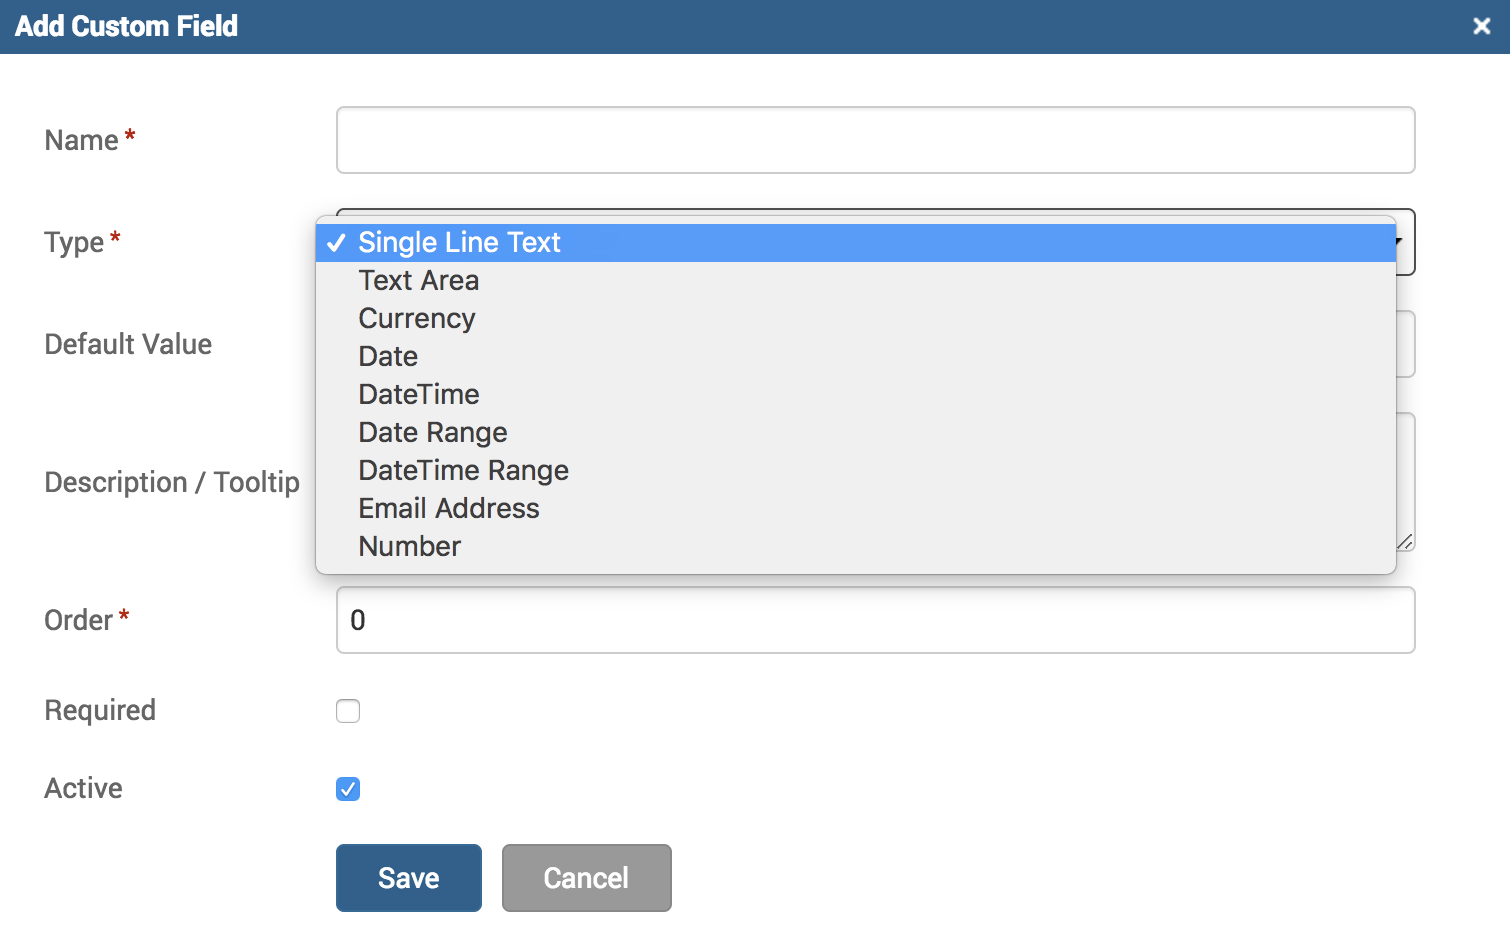
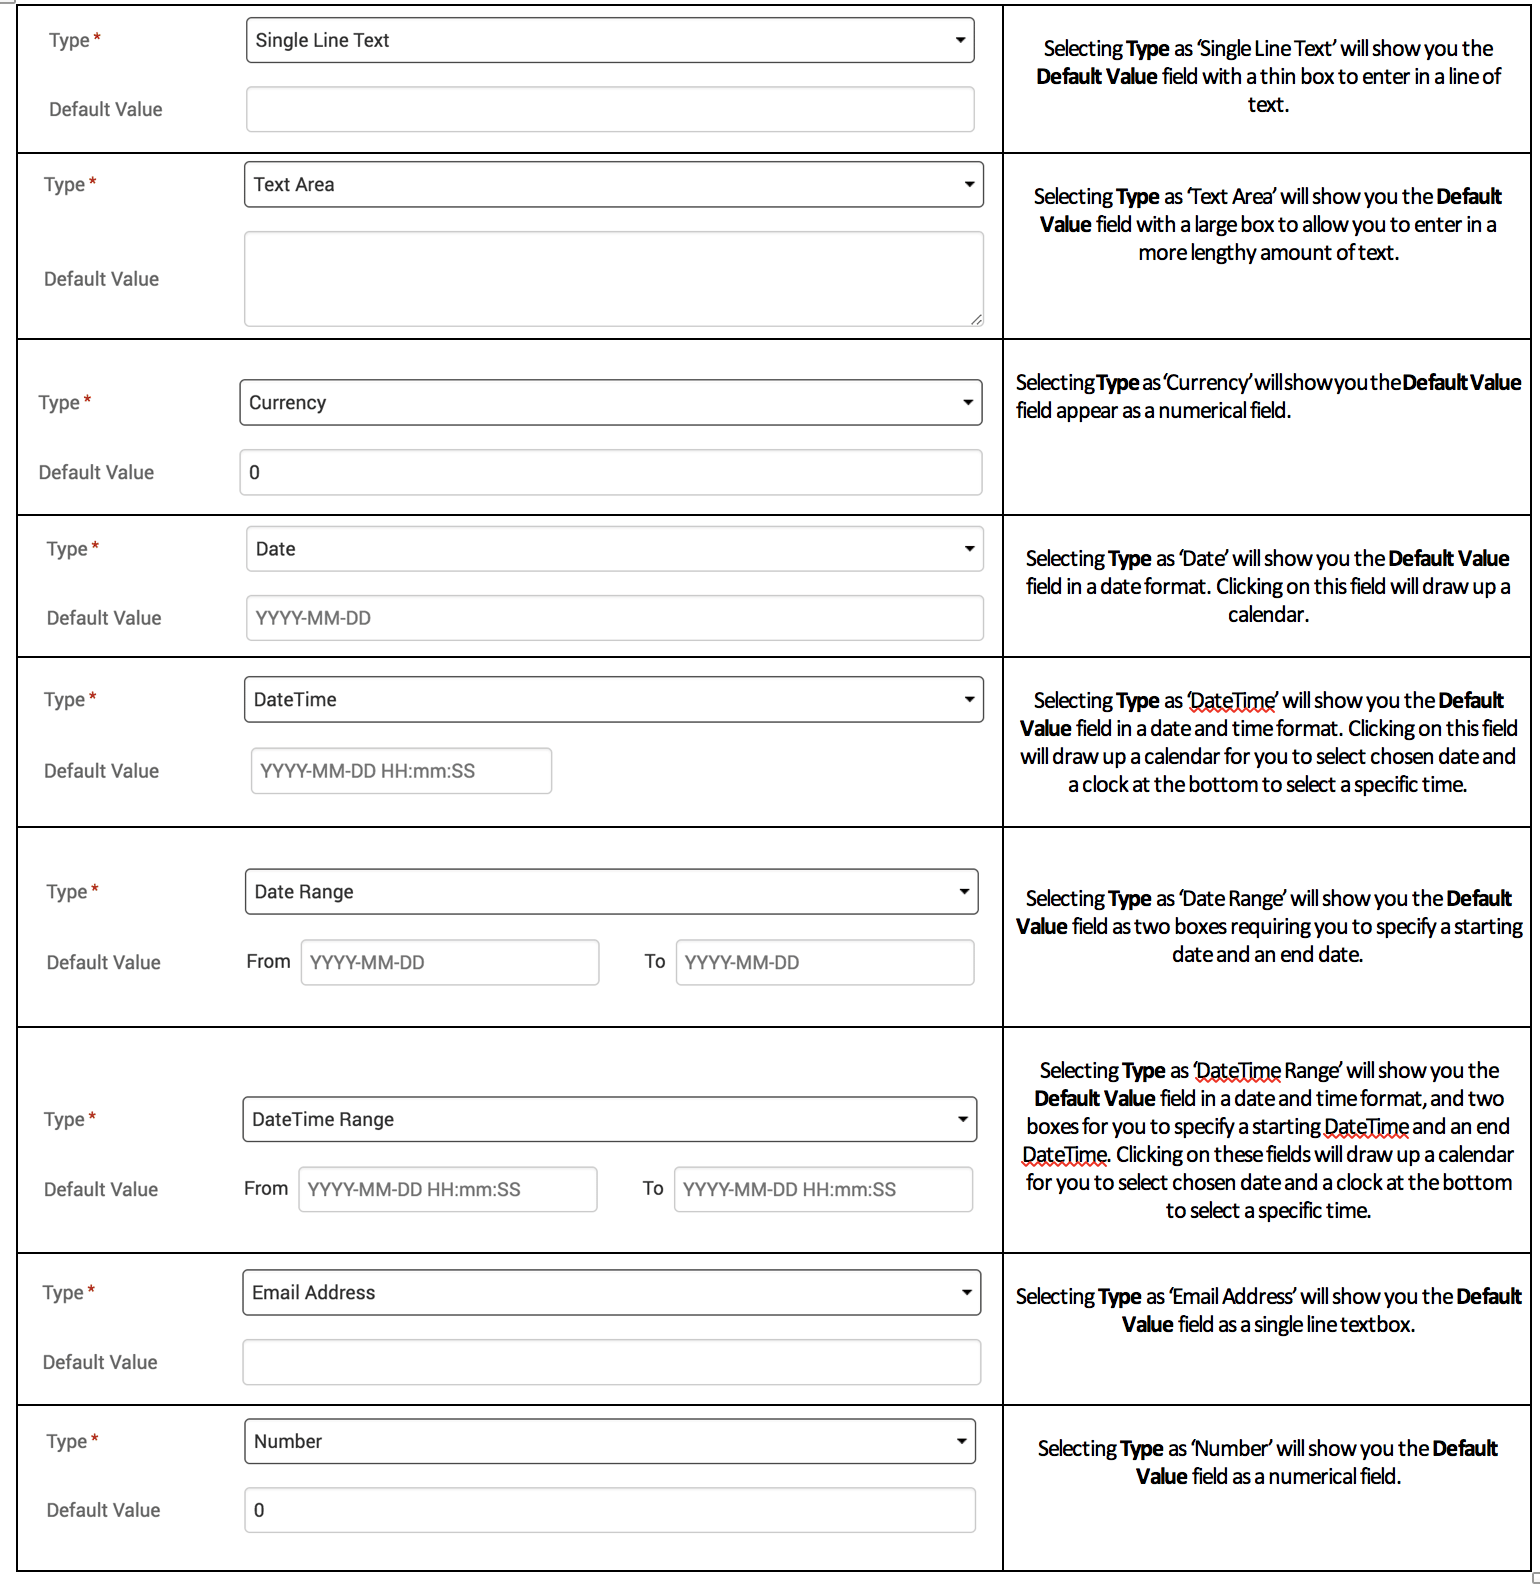
You can see a variety of options available under the ‘Type’ field. Each type will determine how the ‘Default Value’ field will be formatted. Here’s a list of the different ways these choices will impact your custom field to benefit your needs:
You can add a Default Value on this screen to apply universally, or you can leave it blank to allow you to enter different values under each individual Client/Matter. To access Custom Fields under individual Clients and Matters, click on Clients>Clients & Matters>[click on Client name or Matter name]>Custom Fields tab.
You can even add Custom Field Groups from under the same screen, but note these can only be applied at the Mater-level.
The benefits of adding data beyond the predetermined and standard fields is vital for the unique needs and requirements of any business, and that’s why TimeSolv has worked on allowing our customers to be able to directly access and customize their user interface with their own preferred terminology and specificity.
If you’d like to contact TimeSolv support for help, please call 1.800.715.1284 or Contact support!