Tip of the Week: Attach receipts to expense entries & document storage


TimeSolv released an application update this week that includes several major new features for our users as we’ll explain in our Tip of the Week. Our post here will explain these new features and we will be conducting a 30-minute customer webinar on Thursday, March 30 at 1 p.m. EDT/10 a.m. PDT.
Attach Receipts to Expense Entries
We are excited to announce that you will now have the ability to attach receipts to your expense entries and display those receipts on your invoices. When you are on the Expense entry screen in TimeSolv, underneath the description field you will now see the option to upload a receipt. If you hover over the “Choose File” button you’ll see that you can upload gif, png, jpg or pdf file formats and the maximum file size is 10mb.
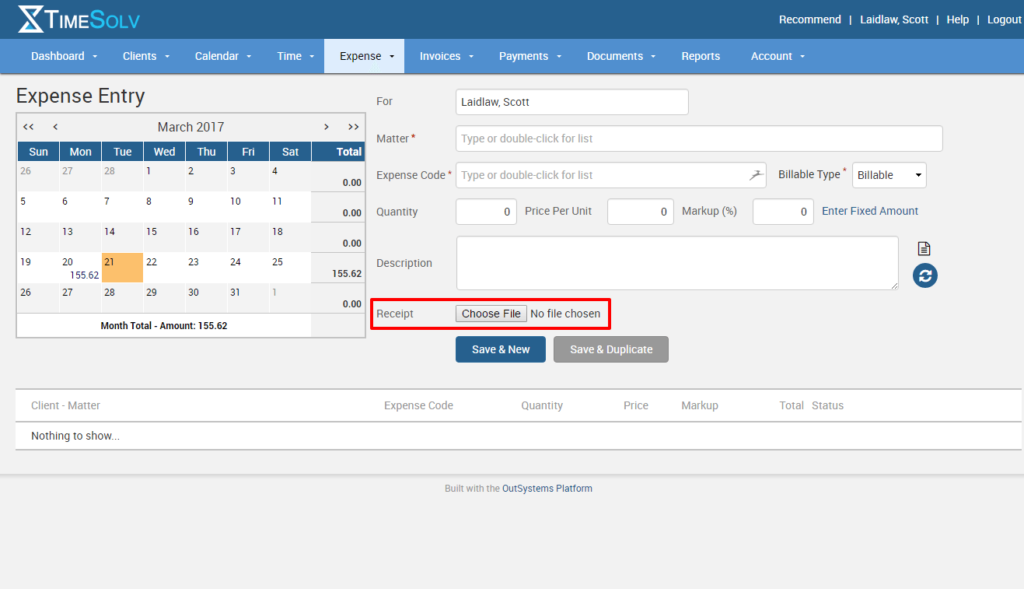
Once you’ve created your entry, you’ll notice a magnify glass icon on the right side of the entry. Hover over that icon, and the receipt you uploaded will appear for you to review.
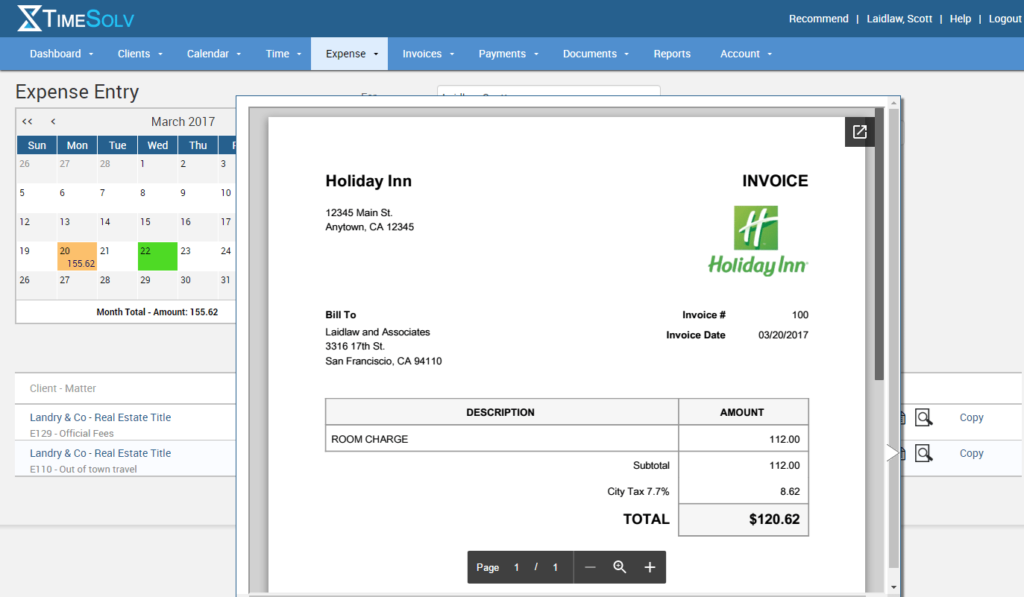
By default, any receipt you’ve uploaded will now be included on client invoices. If you choose to not include these receipts, you can edit that within your billing template in the Expense tab.
Document Storage
With our latest release, you will now see a Documents tab that runs across the main navigation in the application. You will also see a Documents tab under your matters.
Our new document storage feature allows you to create folders and upload documents at the matter level. You can also create tags for your documnets so you can search for certain types of documents across all matters and clients.
We also give you the ability to have versions of your documents so you can see changes as others work on those files. You may upload whatever type of document you’d like, even PowerPoint files!
To upload documents, either navigate to the client and matter and click the Documents tab or click Documents from the main navigatioon tab area and search for your client and matter. From there, you can create new folders or add new documents.
You can also move documents from one matter to another, even to a different client and matter. Also, similar to the expense receipt attachment, once you’ve uploaded a document, a magnify glass icon appears that when you hover over it shows you the document in a pop-up window.

While we think the document storage and expense reciept attachments are fairly intiutive for our users, we know there will always be questions.
wherever you do.
TimeSolv in action.
